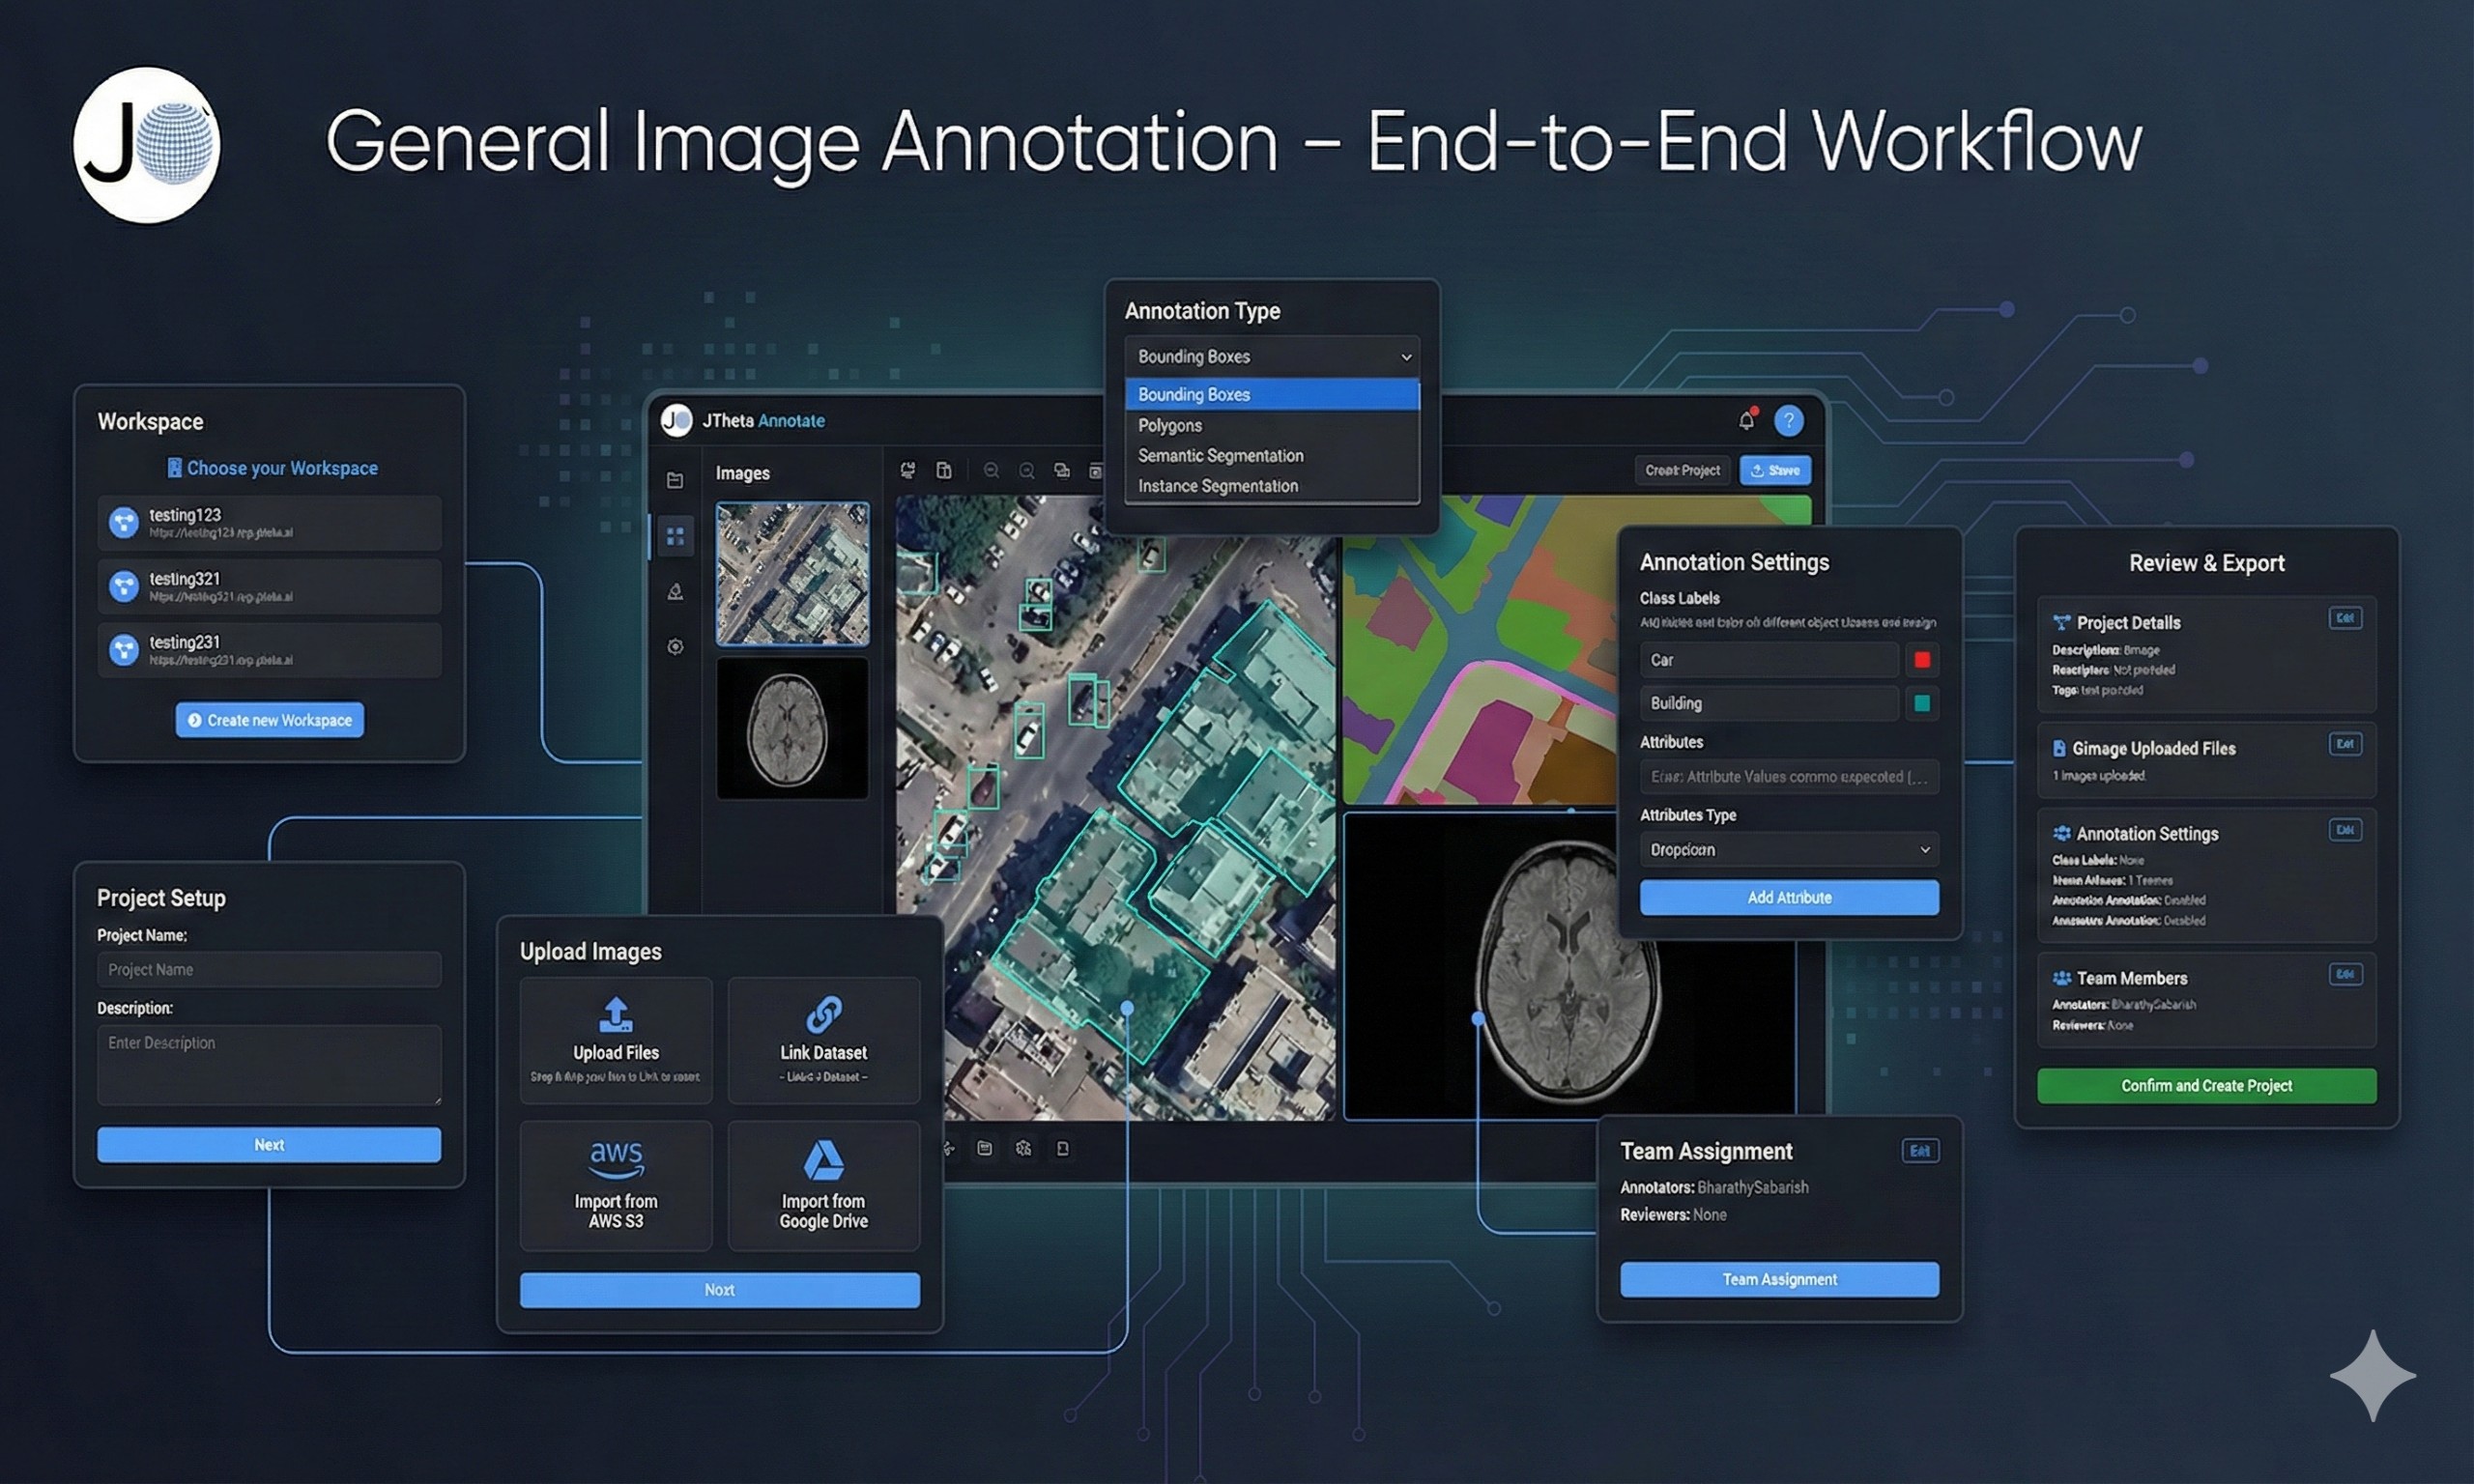
General Image Annotation – End-to-End Domain Workflow
High-quality computer vision models begin with well-designed annotation workflows.
This guide explains the complete, step-by-step process for creating, configuring, annotating, reviewing, and exporting a General Image Annotation project on JTheta Annotate.
This workflow is suitable for:
First-time users onboarding onto the platform
Advanced annotation teams managing large-scale image datasets
AI teams building production-ready computer vision models
Step 1: Choose or Create a Workspace
After logging in to JTheta.ai, you will be directed to the Workspace Selection screen.
A workspace acts as your team’s central environment where:
Datasets are stored
Projects are created and managed
User roles and permissions are assigned
Available Options
Select an existing workspace (e.g.,
testing123,testing321)Create a new workspace using the Create New Workspace option
Action
Choose an existing workspace or create a new one
Your annotation project will be created inside the selected workspace
Note:
User roles such as Admin, Annotator, and Reviewer, along with access permissions, are controlled at the workspace level.

Step 2: Create a New Project
Once inside the selected workspace, you will land on the Workspace Dashboard, which includes:
List of existing projects
Project status overview
Quick actions such as Create Project
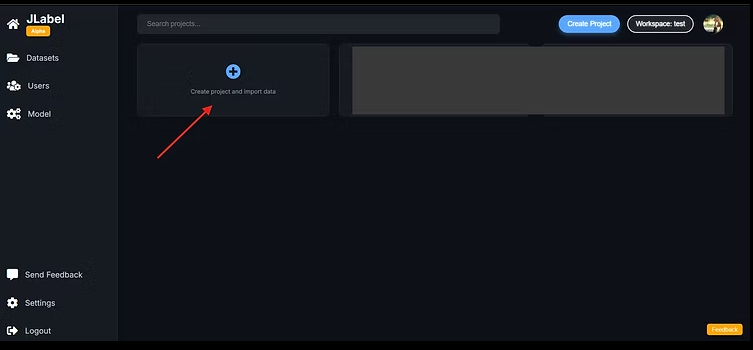
2.1 Launch the Project Creation Wizard
Click Create Project to open the guided setup wizard.
The wizard walks you through the following stages:
Project Details
Upload Images
Annotation Settings
Assign Team Members
Review & Confirm
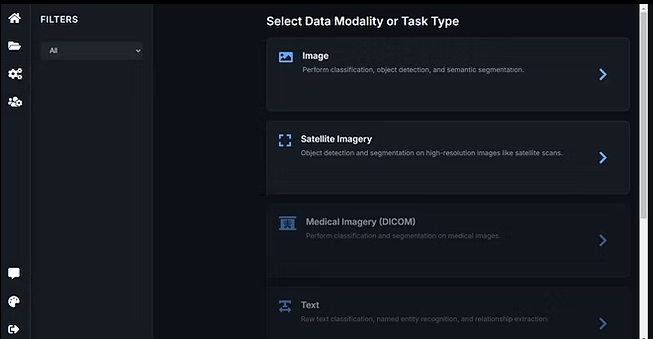
2.2 Select Data Modality / Task Type
You will first be asked to select the data modality for your project.
Available modalities include:
Image (General Image Annotation)
Satellite Imagery
Medical Imagery (DICOM)
3D Point Cloud (LiDAR)
For this workflow:
Select Image (General Image Annotation).
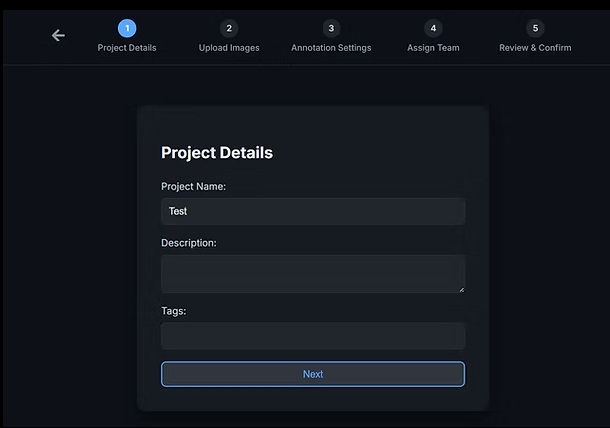
2.3 Configure Project Details
Provide the basic metadata for your project:
Project Name (required)
Description (optional)
Tags (optional, for organization and search)
Example:
Project Name: Street Scene Object Detection
Description: Bounding box annotation for vehicles and pedestrians in urban environments
Tags:
street,vehicles,object-detection
Click Next to continue.
These details help manage and identify projects efficiently within large workspaces.
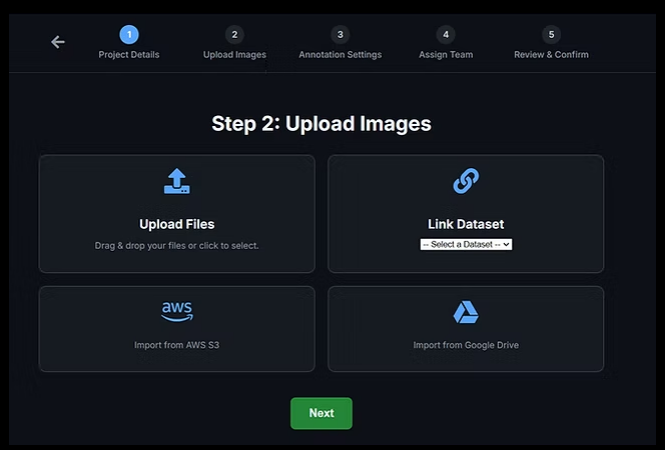
Step 3: Upload Images (Datasets)
Next, connect your image dataset to the project.
Upload Files
Drag and drop local image files
Select files manually via file picker
Link Existing Dataset
Use a dataset already stored in the workspace
Cloud Imports
Import from AWS S3
Import from Google Drive
3.2 Provide Dataset Information
For each dataset, specify:
Dataset Name (e.g.,
StreetScenes-v1)License Type (e.g., CC0, CC-BY)
Once completed, click Next.
The platform will:
Generate image thumbnails
Process metadata
Prepare files for smooth annotation inside the editor
Step 4: Configure Annotation & Workflow
This step defines how annotations are created and how work flows across the team.
4.1 Annotation Settings
A. Class Labels
Create the object classes used during annotation.
Each class includes:
Class Name (e.g., Car, Person, Road)
Color (visual differentiation in the editor)
Supercategory (optional grouping)
Example:
Class: Car
Supercategory: Vehicle
You can define as many classes as required for your dataset.
B. Annotation Type
Select the geometry type best suited for your task:
Bounding Boxes
Polygons
Semantic Segmentation
Instance Segmentation
The selected type determines:
Tools available in the annotation editor
How labels are drawn and stored
C. Attributes (Optional)
Enhance annotations with additional metadata.
Example Attributes
Color: Red, Blue, White
Condition: New, Damaged
Size: Small, Medium, Large
Supported input types:
Dropdown
Text input
Button selection
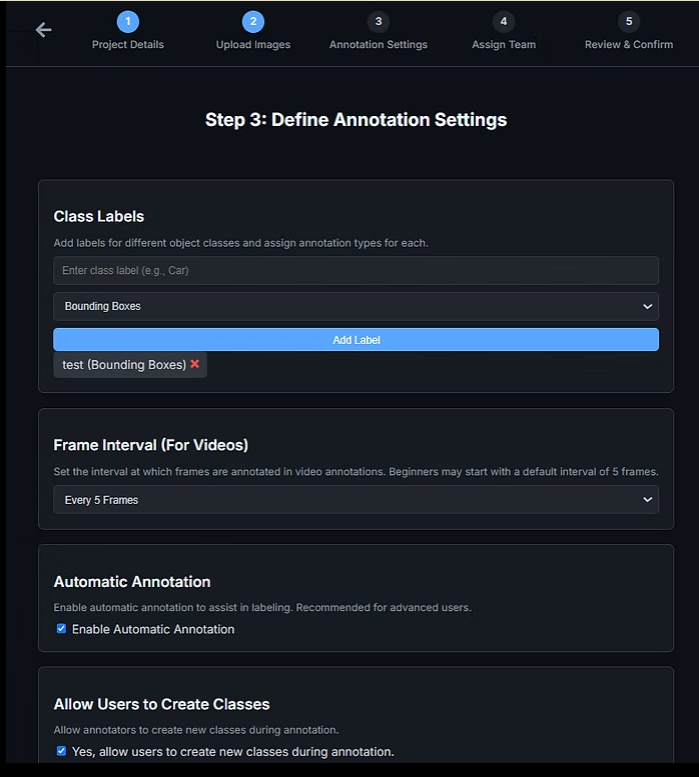
D. Advanced Options
Optional configuration settings include:
Enable Automatic Annotation
Allows AI-assisted pre-annotations
Allow Users to Create New Classes
Useful for exploratory or evolving datasets
Click Next once annotation settings are complete.
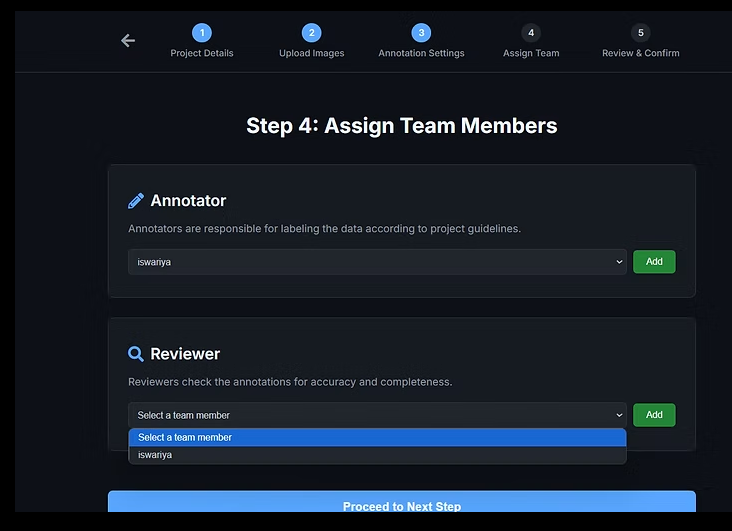
4.2 Assign Team Members
Assign collaborators with appropriate roles:
Annotators – Create labels on images
Reviewers – Validate, approve, or reject annotations
If no reviewers are assigned, the system will warn:
“No reviewers assigned — annotations will be considered final once submitted.”
Review assignments and click Next.
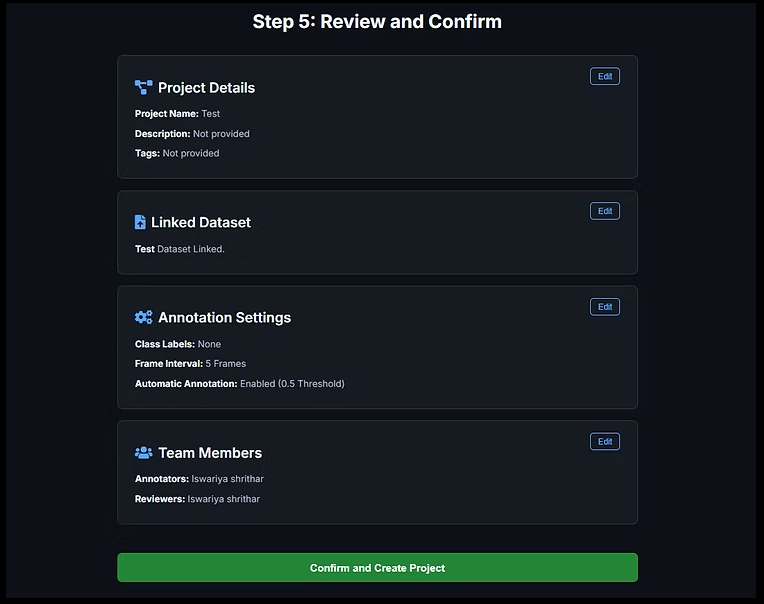
4.3 Review & Confirm
The final screen summarizes all configurations:
Project details
Uploaded datasets
Annotation classes and settings
Attributes and AI options
Team assignments
Click Confirm and Create Project to finalize setup.
Step 5: Annotate, Monitor Progress & Export Data
Once the project is created, annotation can begin immediately.
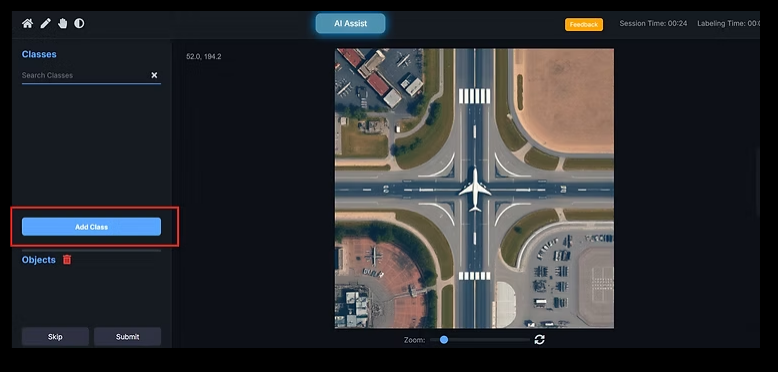
5.1 Start Annotating
Click Annotate to open the Annotation Editor.
Editor features include:
Class panel for selecting labels
Objects list to manage annotations
Zoom controls for precision
Undo / redo actions
Geometry tools based on annotation type
AI-assisted annotation options
AI Assist Modes
AI Assist – Detects objects based on defined classes
AI Assist (Extra Classes) – Suggests additional common objects beyond predefined classes
After completing an image, click Submit.
Workflow behavior:
With reviewers: To Label → In Review → Done
Without reviewers: To Label → Done
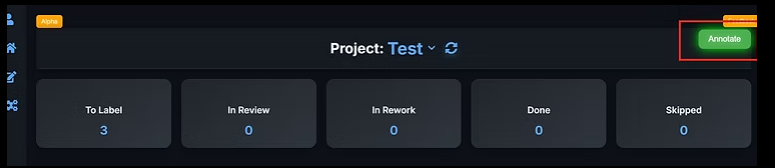

5.2 Project Overview & Analytics
The Project Overview Dashboard provides visibility into progress and quality.
Status buckets:
To Label
In Review
In Rework
Done
Skipped
Analytics include:
Annotation throughput
Annotator productivity
Class distribution
Timeline activity
These insights help identify bottlenecks and optimize team performance.
5.3 Export Annotated Datasets
Export datasets once annotations are ready.
Export configuration:
Versioning (e.g., v1.0, v1.1)
Format:
COCO
YOLOv5
CSV
JSON
Each export includes:
Annotation data
Attributes and metadata
ML-ready directory structure
Conclusion
The General Image Annotation workflow in JTheta.ai is designed to support scalable, high-quality computer vision development—from dataset onboarding to training-ready exports.
By combining structured workflows, AI-assisted annotation, and enterprise-grade quality control, JTheta.ai enables teams to move from raw images to reliable datasets with confidence.